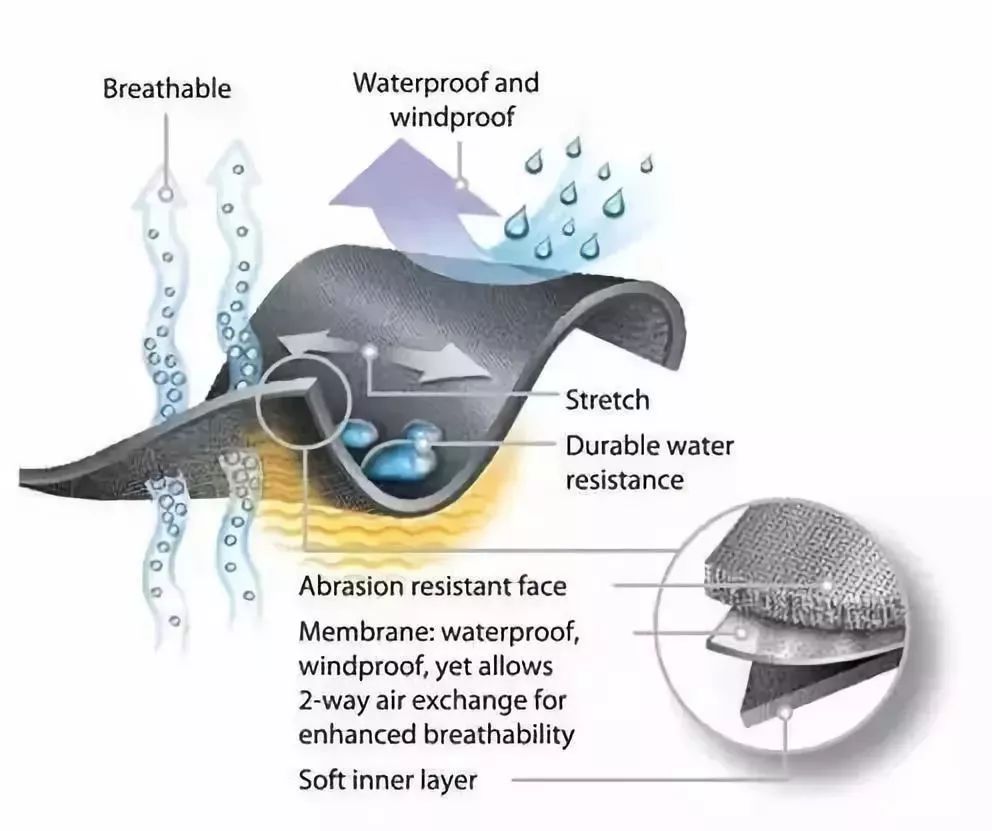
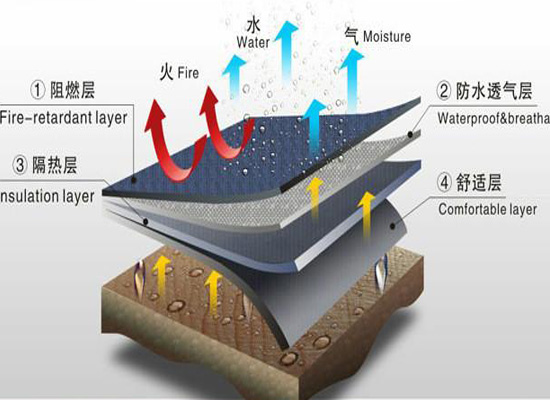
What material is fire retardant cloth?
What material is Fireproof Cloth?
2. Product quality requirements, common problems and solutions during the process
The product quality requirements, common problems and solutions for each process of the company are detailed in the “Inspection Procedures for Each Process” and “Operation and Safety Regulations for Each Equipment” issued by the company.
As operators in each position, they must be proficient in the relevant knowledge of this operating position. Then by accumulating experience in practice, you can become a qualified operator.

3. Inspection and measurement
1) The importance of inspection
Let’s talk about the importance of inspection.
For enterprises, product quality is the foundation of the enterprise’s reputation and marketing. How many major factors does the product quality of wires and cables mainly consist of? In summary, there are five main factors: raw materials, equipment, technology, manufacturing technology and inspection. We often hear it said like this: product quality is determined by manufacturing, not testing. This is actually a philosophy spoken by a typical Chinese philosopher. In fact, product quality and manufacturing technology are fundamental, and inspection and control are the key. From the perspective of five major factors, the quality of raw materials, whether they are processed according to process requirements, whether there are quality problems in each manufacturing link, whether the final product meets the requirements, etc. are all determined by inspectors and operators based on corresponding standards. .
There are three main links in our factory inspection. The first is raw material inspection, the second is process inspection, and the third is finished product inspection. Don’t think that inspection is only the responsibility of the inspectors. In fact, process inspection is divided into two parts. One is the inspector’s inspection of the semi-finished products in the production process, and the other important link is the self-inspection and mutual inspection performed by the operators. Inspectors may only be able to detect superficial phenomena. Operators’ self-inspection and mutual inspection are the fundamental guarantee of product quality. As soon as the operator discovers a quality problem during the production process, he can immediately judge the quality by himself. If he cannot judge, he can ask the inspector or relevant technical personnel to do it. Therefore, a qualified operator must not only be proficient in operating the equipment, but also be familiar with the quality requirements of the products to be produced, and be able to check whether the quality of the products meets the process requirements.
Of course, products with quality problems that appear during production must be strictly assessed, from small to large, from light to severe, and there is a complete set of assessment methods. Otherwise, the role of all inspection work will be weakened, and the role of product quality control will not even be achieved.

2) Commonly used measuring tools
Commonly used tools for measuring outer diameter and thickness include micrometers, vernier calipers, and projectors;
Commonly used tools for measuring length include vernier calipers, circle rulers, rulers, tape measures, mechanical meter counters, electronic meter counters, etc.;
Commonly used tools for measuring temperature are thermometers, thermocouple thermometers, etc.
Commonly used measuring instruments in our company include electronic scales, multimeters, vacuum pressure gauges, barometers on equipment, ammeters, voltmeters, tachometers, etc.
3) Basic measurement methods
1. Circular conductor size measurement
Tools used: outer diameter micrometer or vernier caliper
Measurement steps:
(1) Circular conductor diameter and f value measurement
Take a sample of about 1m, straighten the wire sample, and place it on the same section perpendicular to the axis of the sample.
By measuring in mutually perpendicular directions, D1 and D2 can be obtained. This measurement is performed at three places at both ends and in the middle of the sample; 6 data are obtained, and the average value is taken.
D average = (D1+D2+…+D6)/6
(2) The f value is the out-of-roundness of the conductor. The f value is defined by the difference between the maximum reading and the minimum reading measured on the same section. According to the above measurement results, take the largest difference among the diameter differences measured on the three sections as the f value.
2. Insulation thickness and sheath thickness measurement
Tools used: Measuring projector
Measurement steps:
(1) Production;
(2) Measure the thinnest point of the test piece as the first measurement point;
(3) When the test piece is circular, measure 6 points as equally spaced as possible along the circumference of the test piece, as shown in Figure 4-1.
(4) When the inner surface of the test piece is a stranded wire core mark, the thickness at each point should be measured at the thinnest point at the bottom of the line mark groove as shown in Figure 4-2, and 6 points should be measured as equally spaced as possible along the circumference of the test piece. .
(5) The sector wire core should be measured at 6 points as shown in Figure 4-3.
Measurement results and calculations
The average thickness δ of each sample is expressed by the arithmetic mean of the measured values at each point of the test piece.
δ=(δ1+δ2+δ3+δ4+δ5+δ6)/6
What should be paid special attention to here is: the so-called insulation thickness of the sample,�The average thickness of the specimen. In product standards, it is generally stipulated that the insulation thickness shall not be less than the nominal value of the insulation thickness specified in the standard. That is to say, the average value of the insulation thickness measured according to the above method shall not be less than the nominal value. The maximum or minimum value among the individual values cannot be regarded as the insulation thickness.
The average value and the thinnest point are two different indicators. Neither one of them can be ignored. Only when these two indicators meet the standard requirements at the same time, the product will be considered qualified. If any one indicator fails to meet the requirements, it will not be considered qualified.
What is mentioned above is a standard measurement method. In fact, it does not need to be so complicated in the production process.
During the actual measurement, the operator peels off the insulation or sheath, uses a micrometer or vernier card to measure the thinnest and thickest points, and then takes the average thickness. When the thickness is thin and the judgment is difficult, use the above method to make the final judgment. In addition, frequent measurements must be taken during online production to ensure that the thickness has not changed during the production process. This is mainly calculated by measuring the outer diameter and cable core diameter. This data sometimes has too large an error, so it must be measured during the lowering or the cable core diameter. The skin is peeled during the production process, and the data measured on the cross section shall prevail.
3. Measurement of pitch
Tools used: caliper or ring ruler
Measurement steps:
(1) Cover the conductor with a piece of paper and mark it with a pencil. Or count the number directly on the surface of the conductor. Several stranded conductors or insulated wire cores are measured along the longitudinal axis.
7. Commonly used calculation formulas
1. Cross section of conductor
1) Single conductor
S = πd2/4 (mm2)
2) Regular stranded conductor
S = (πd2/4)* n * k1
where d——outer diameter of conductor (mm)
n——number of twisted wires
to
π——Pi, 3.1416
2. Weight of conductor
W = S * ρ* L
Where W——Conductor weight (kg)
ρ——Material density, copper 8.89, aluminum 2.7
L——The length of the conductor (km)
3. Insulation outer diameter
D = d + 2*t (mm)
where D——insulation outer diameter (mm)
D -conductor outer diameter (mm)
t——Insulation thickness (mm)
4. Cross-sectional area of insulation layer
S1=(D2–d2)*π/4
Or S1=π*(d+t)*t
5. Weight of insulation layer
W1=S1*ρ* L
Where W1 – weight (kg)
ρ——Material density, PVC is 1.42~1.45, XLPE is 0.95
L——Length of wire core (km)
The outer diameter, cross-sectional area, and weight of the sheath are calculated in the same way as the insulation layer.
6. Stranded outer diameter
The following is the calculation method of the stranded outer diameter of the regular stranded structure:
For regular twisting, the outer layer generally has 6 more strands than the inner layer.
Structure of 1+6: D0 = 3 * d
2+8 structure: D0 = 4 * d
Structure of 3+9: D0 = 4.154 * d
Structure of 4+10: D0 = 4.414 * d
Structure of 5+11: D0 = 4.7 * d
If there is one or more layers outside, then
D = D0 + 2 * n * d

Where n——number of stranded layers
Wire and cable products are divided into five categories: bare wires, wires and cables for electrical equipment, power cables, communication cables and optical cables, and winding wires. Regarding the allowable long-term operating temperature of wire and cable cores, rubber insulation is usually 65°C, and polyvinyl chloride insulation is 70℃, cross-linked polyethylene insulation is 90℃; the maximum allowable temperature of the conductor during short circuit (the longest duration does not exceed 5s): polyvinyl chloride insulation is 160℃, cross-linked polyethylene insulation is 250℃.
The difference between XLPE cable and PVC cable:
1. Low-voltage cross-linked (XLPE) cables have developed rapidly since they were put into use in the mid-1990s. They currently account for half of the market share with polyvinyl chloride (PVC) cables. Compared with PVC cables, cross-linked cables have higher carrying capacity, stronger overload capacity and longer service life (the thermal life of PVC cables is generally 20 years in a better environment, while the thermal life of XLPE cables is generally 40 years); When PVC is burned, it will decompose and release a large amount of black smoke and toxic gases, while XLPE will not produce halogen toxic gases when burned. The advantages of cross-linked cables are increasingly recognized by the design and use departments.
2. Ordinary PVC wires and cables (insulation and sheath) burn quickly, fueling the fire, and losing power supply capability in 1 to 2 minutes. The black smoke released by their combustion and decomposition can reach the level of being invisible, making it difficult for people to breathe and evacuate. . What’s more serious is that when PVC burns, it will decompose and release highly toxic and corrosive halogen gases such as hydrogen chloride (HCL) and dioxins, which are the main cause of death in fires (accounting for 80% of fire death factors), and become dilute Hydrochloric acid conductive film adheres to electrical equipment, seriously reducing the insulation performance of the equipment and causing secondary disasters that are difficult to remove.
When wires and cables (insulation and sheath) burn, they burn quickly, fueling the fire. The power supply capability will be lost in 1 to 2 minutes. The black smoke released by the combustion and decomposition can reach the level of being invisible, making it difficult for personnel to breathe and evacuate. What’s more serious is that when PVC burns, it will decompose and release highly toxic and corrosive halogen gases such as hydrogen chloride (HCL) and dioxins, which are the main cause of death in fires (accounting for 80% of fire death factors), and become dilute Hydrochloric acid conductive film adheres to electrical equipment, seriously reducing the insulation performance of the equipment and causing secondary disasters that are difficult to remove.


